
Understanding the RecordID Variable in Salesforce Screen Flows
The RecordID variable in Salesforce Screen Flows is flow variable that captures the Id of the record that initiated the flow. It allows you to access and manipulate data associated with the record, opening up a range of possibilities for customisation and automation.
Creating and Configuring the RecordID Variable
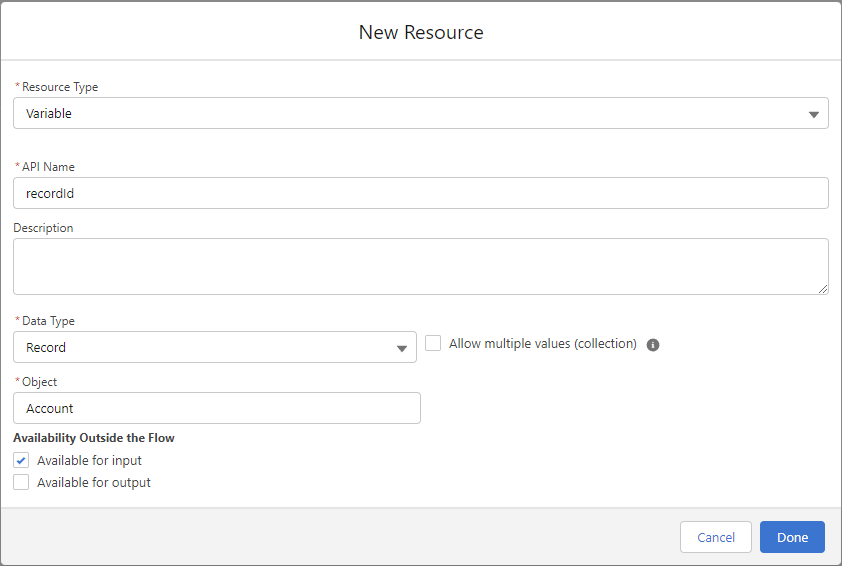
In order to use the RecordID Variable, we first need to create it. This can be done by creating a new resource in the flow builder. When creating this resource, it should look similar to the below image. The object you select may differ depending on what object you will want to use with this particular screen flow!
Using the RecordID Variable in Your Flows
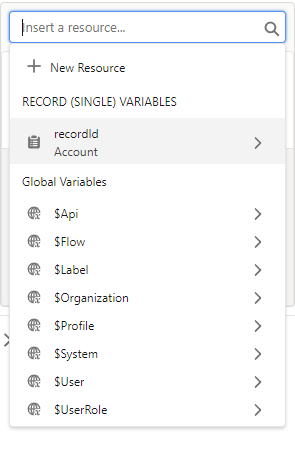
Once we’ve created our RecordID variable, we can now reference this in our flows, this can be done by using the RecordID resource within the flow builder. This resource can be used in the same way that we could use the record variable that would be created when we used a “Get“ element in the Flow! Examples of how you can use this can be found below:
Displaying Record Information with the RecordID Variable
With the RecordId variable at your disposal, you can effortlessly display relevant record information to users during the flow. For example, you can use a “Display Text” or “Display Rich Text” component to show the record’s name, status, or any other field value you choose.
Updating Related Records Using the RecordID Variable
Using the recordId, we are able to get related records, for example, this could be done to find all Opportunities associated to an account and display these in a data table for your users to select a particular record!
How Can You Handle Errors in Salesforce Screen Flows?
As always when working with Flows, It’s crucial to consider error handling when working with the recordId variable. Since the variable relies on the existence of a record, it’s essential to account for scenarios where the record might be deleted or inaccessible. You can implement validation checks or utilise record lookups to confirm the record’s presence before proceeding further in the flow.
Adding Your Screen Flow to the Lightning Page
Once you’ve created your Flow, you’re ready to add it to the lightning page! This is done by editing the lightning record page and dragging the Flow component to the desired location on the page.
Once you’ve got the component on the page, you’ll be able to configure the component further in the right panel, here you’ll be able to specify the Flow that you want to run. If you’re using the recordId variable in this flow, you’ll also want to check the box called “Pass record ID into this variable” Under the recordId checkbox, this will ensure that the current record ID is pushed into your flow.

Enhancing User Engagement and Automation with the RecordID Variable
Using the RecordID variable in Salesforce Screen Flows empowers you to create dynamic and personalised experiences within your Salesforce Org. By understanding how to access and utilise this variable effectively, you can enhance user engagement, automate processes, and streamline data management. Experiment with the possibilities it offers, and unlock the full potential of your Screen Flows
Thanks for reading,
Calum Chappell
The Tether Team
#salesforce #salesforcecrm #tethertips #tether #recordid #variable #screenflows