
Be pinpoint accurate with the timing of your communications using the schedule option for social posts and emails in Pardot
Two things that i always refer to in Pardot training are consistency and cadence of communications. I will take you through how i leverage Pardots scheduling functionality to use my time better and also build consistent timing for delivery of content.
How I run my weekly Tether Tip, from start to finish:
I always look at the Tether Tip as a three pronged approach. This consists of:
- A Blog Post for the website
- An email to my Newsletter List
- Social Media Posts for LinkedIn and Facebook
Stage 1: Blog Post on the website
This is generally the most time consuming of the jobs, I usually schedule an hour to write the Tip itself, and its important to not repeat content that has been put out before, and also to keep the theme and tone consistent.
I like to use tips that are practical, useful or even just a trick I’ve come across either in training or in the day to day use of Pardot (in this case) or Salesforce. Pardot being the widely used and covered tool it is, the web is full of inspiration, hints and tips. At times I will learn from some of the better blogs out there, so for me i like to write about small wins I’ve had while using the platform. For example I’m ironically writing this tip for next week as I will be on leave, so this is the ultimate use case blog.
Stage The scheduling function on WordPress:
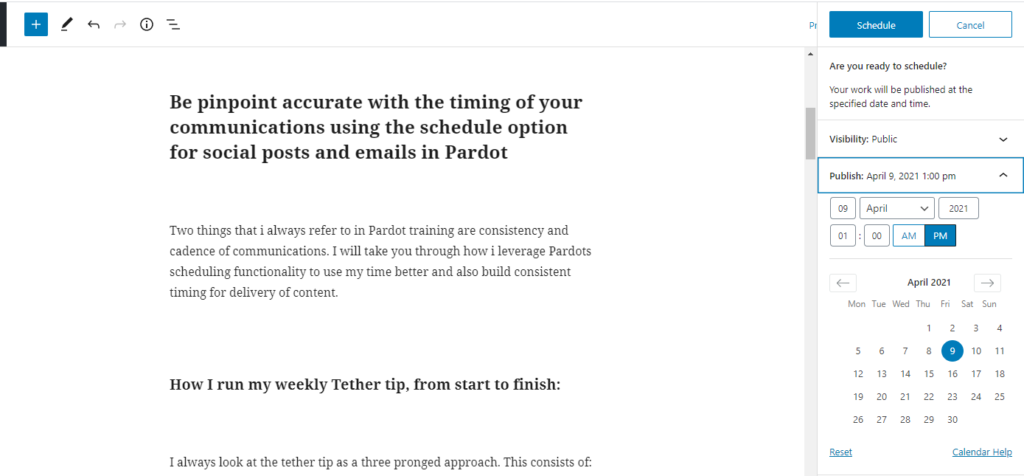
Once I have drafted my post, and previewed it, I can schedule the post to publish at the desired time. Generally I will aim to have the post go live an hour before the emails and social media posts go out, for the simple reason that you dont want a hold up on the post (for example should there be a server issue) and people clicking your link on social media and getting a 404 Error. Page not found does not look good!
Once Ive scheduled the post I will copy the URL and then switch to my Pardot Jobs:
1.Custom URL (Redirect):
The first of my Pardot Jobs is to create a custom redirect for Email and Social media, this link will bring people straight to my blog, but we get nice information on how many click throughs we get from each channel, and can report accordingly:
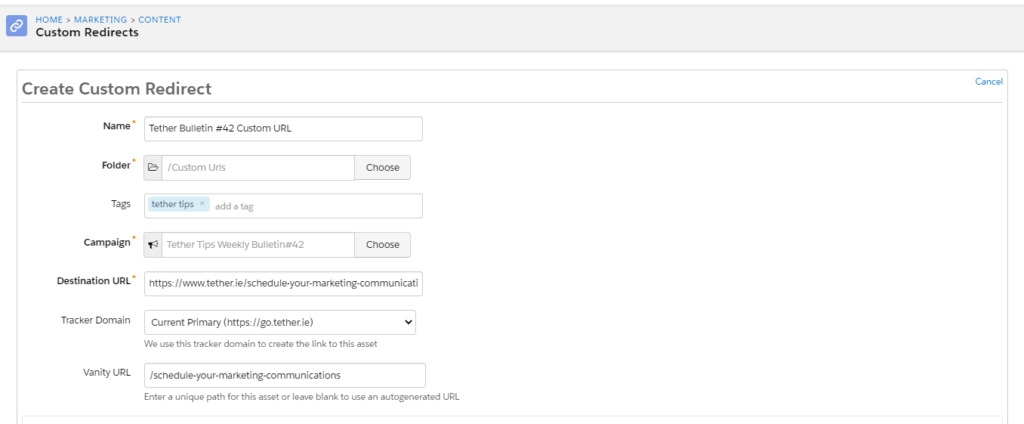
The best thing is I can clone an existing Custom URL if its going in the same folder, I can just change the destination URL and the campaign and the first job is almost done.
2. Design My Email
Again referring to the consistency in the communications when using Pardot, I use a template for my emails that saves me time on this job, I use Photoshop to manipulate our header image (top of the blog and used on social) and drop it into the email template, use my custom redirect, and take some of the content from the blog post as the type.
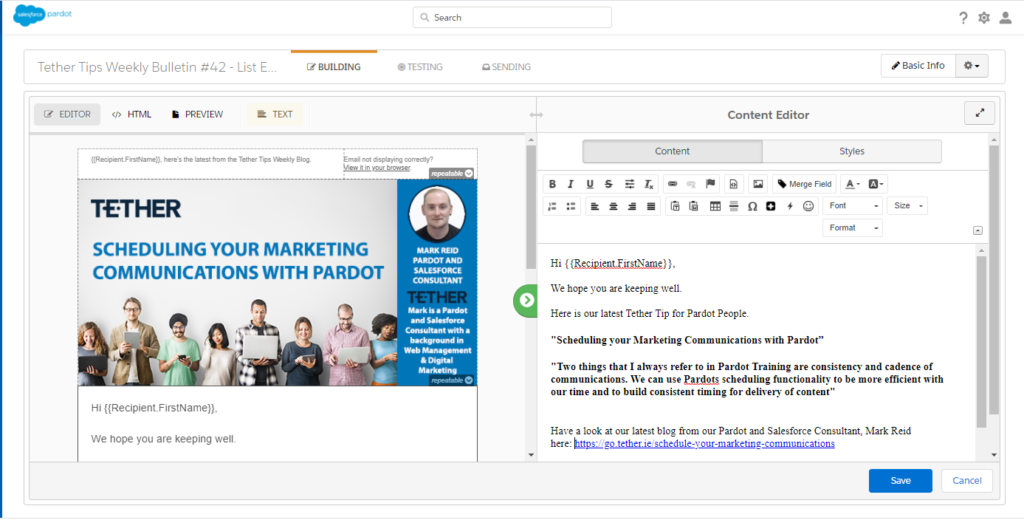
Once I have the email built, I schedule this for the desired time:
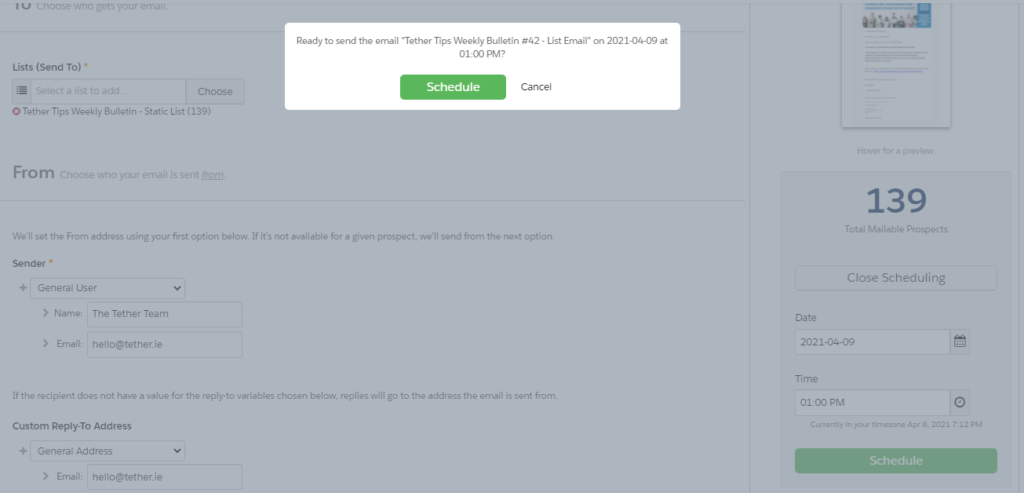
2 of the prongs are set up and scheduled, the last piece of the puzzle is the Social Media Post.
3.Use Pardot to schedule your Social Media Posts:
As Pardot is your Marketing Hub, it allows us to post on Social Media and report on interactions too, here at Tether we use LinkedIn and Facebook, but there are other platforms available through the connector (Twitter for example).
Posting is really simple and again I will use my Photoshop banner image from the blog post and email, to keep consistency and branding across all three channels.
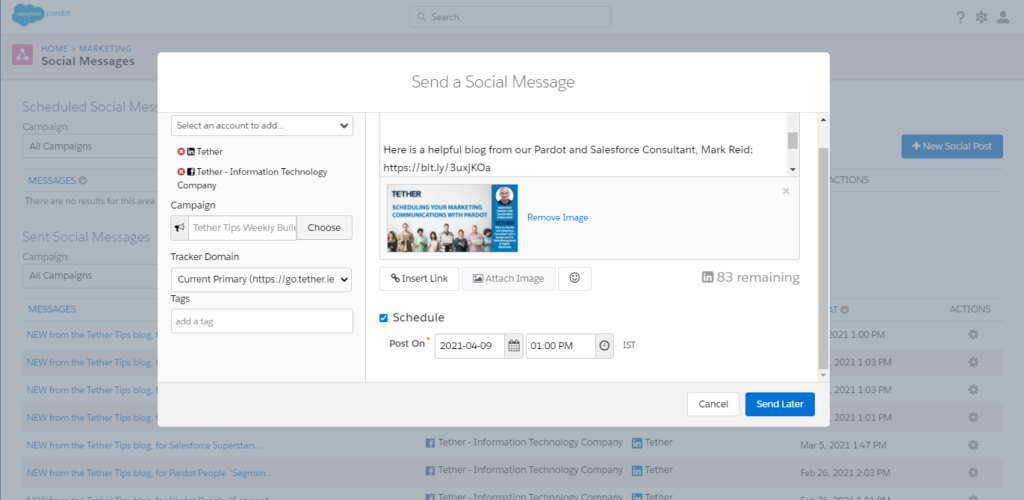
Once I’m happy with the content, I simply schedule the posts, confirm, and then I always check back on all 3.
I preview the scheduled Email, reread the blog post, and check on my scheduled Social messages. I can then sit back and let the Automation do the rest. This means that you can schedule in Marketing time for whenever your Diary lets you, and you can maintain that pinpoint timing of your asset delivery.
We hope this helps, and thanks for reading,
The Tether Team.
#marketingautomation #pardot #salesforcepardot #tethertips