Forecasting is an important activity to predict future performance which in turn allows for more accurate budgets, goal setting and decision making. The sales forecast will consist of several Opportunities in the pipeline, which are closing within a certain date range. This can be per quarter, per month, per year or any custom date range that is of importance to your business.
Why Avoid Spreadsheets and Use Forecasting Features in Salesforce?
It is common to track forecasting in spreadsheets and documents, however this doesn’t give up to date and accurate data. The good news is that the forecasting features available in Sales Cloud are easy to set up and will provide invaluable forecasting information for your team.
Why Should You Enable Forecasting in Salesforce?
Your Salesforce Administrator can follow the steps below to configure forecasting in Salesforce:
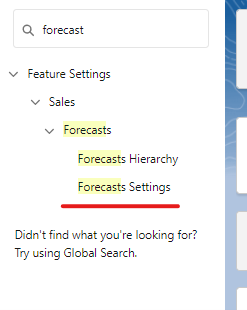
- In the Set-Up Menu search for ‘Forecast’ in the Quick Find box.
- Enable Forecasting by switching the toggle shown below:

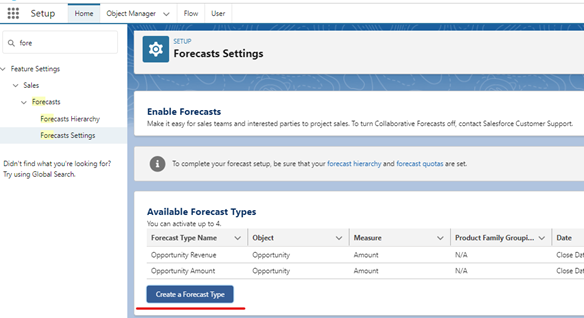
- Choose the Forecasting Type. You can choose from Opportunities or Opportunity Products. You will also have the option to choose the following:
- A Measure (revenue or quantity)
- Date Types (what date field is used in calculations, e.g. Opportunity Close Date)
- Forecasting Hierarchy
- Optional Filters (to show only the data you need)
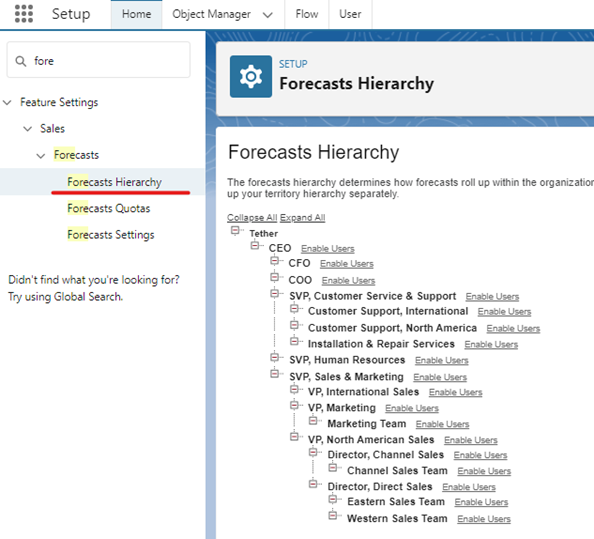
4. Set up the Forecast Hierarchy. The Forecast Hierarchy will determine how forecast totals roll up in your organisation. For example, the sales manager’s total will be a roll up of those below that User in the Forecast Hierarchy. The Forecast Hierarchy will automatically set to replicate the Role Hierarchy in your Salesforce org, however this is customisable.
5. To find the Forecast Hierarchy, go to the Set Up Menu. Search for ‘Forecast Hierarchy’ in the Quick Find box.
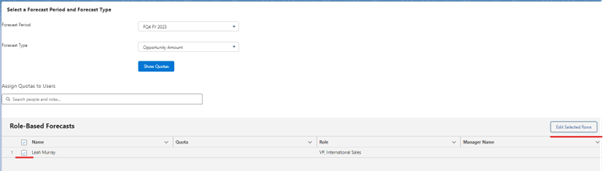
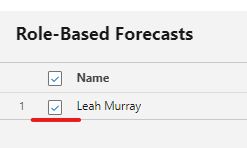
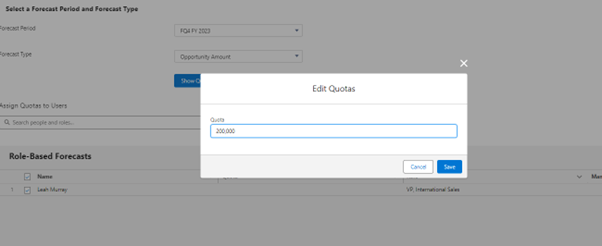
6. Set up Quotas for Users. Go to the Set Up Menu and search for ‘Forecast Quotas’ in the Quick Find box. Click on ‘Show Quotas’ to adjust the Quota for each User.

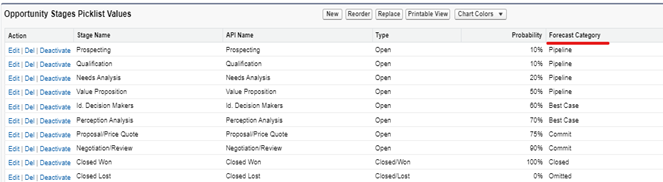
7. The Forecast Categories will correspond to the Opportunity Stages. You can edit which Opportunity Stage the Forecast Category is associated with in the Stage field on the Opportunity.
Tips
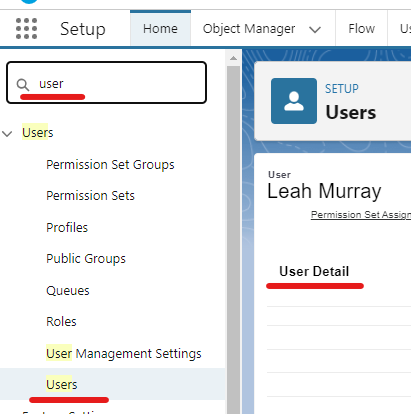
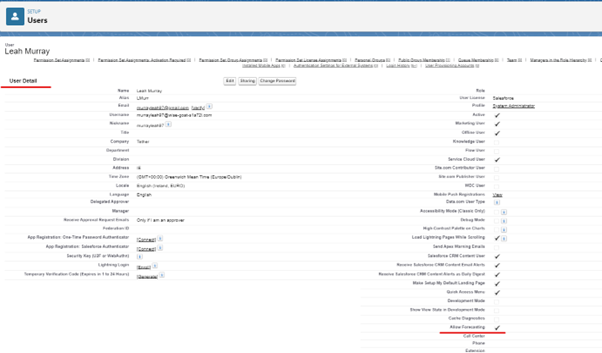
Each User that needs to be included in Forecasting needs the ‘Allow Forecasting’ permission on their User details. Otherwise, the User won’t appear in the Forecast Hierarchy or Forecast Quota settings.

Don’t forget to add the Forecast Tab to the Navigation Bar. You can do this in the App Manager section of the Set-Up Menu. The Forecast chart will then be available to your Users.
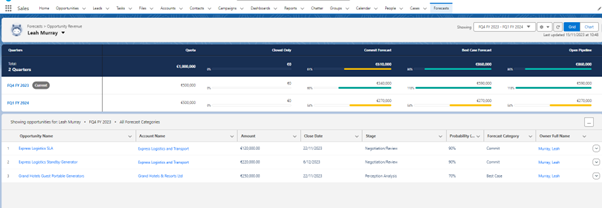
Now you are ready to start using Forecasts in Salesforce! Remember that the accuracy of your Forecasts depends on the accuracy of your Opportunities, Quotas and data in Salesforce. However, setting up Forecasts is a step in the right direction to achieve more reliable Forecasts to analyse sales and performance.