Let’s face it, building a thriving Salesforce community is all about empowering your users. But what if you have a goldmine of internal resources – FAQs, guides, white papers – that could supercharge their experience, but they’re locked away in some dusty Salesforce corner? Enter Libraries: your key to unlocking a knowledge-sharing bonanza for your community.
In this post, we’ll dive into the world of Salesforce Content Libraries and show you how to share those precious resources with your community users.
Enabling Salesforce CRM Content
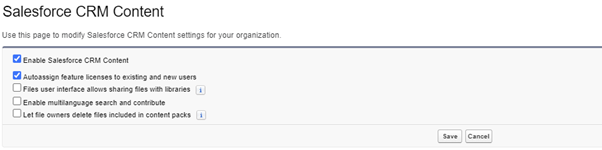
First, we have to ensure that we’ve enabled Salesforce CRM Content in our Org.
This can be done by navigating to the setup menu and typing “Salesforce CRM Content” in the Quick Find bar and ensuring the “Enable Salesforce CRM Content checkbox” is checked (See Below). The “Autoassign feature licenses to existing and new users” should also be checked, as this will ensure your users have the required licenses to access your libraries!
Creating a new Library:
Once this has been done, you’ll be able to navigate to the files tab by clicking on the App Launcher, typing in “Files” and clicking on the “Files” Item.
To create a new Library, first click on the libraries tab on the left side of the page.

From here you can click on “New Library” and give your library a name, description and image (If required), you can then add your files to the library.
Once your library has been created and you’ve added your files. It’s time to share your new library with your community Users.
To do this, click into your library, and press the “Manage Members” button in the top right corner of the page.
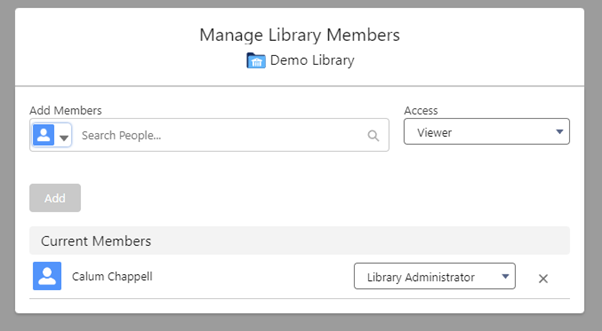
From here you can give your Users access by either adding a Public group as a Member, or by adding individual users separately. If you have a large number of community Users I’d recommend adding those to a Public Group first and then sharing the Library with the Public Group.
These members can be given access levels too, these being:
- Viewer
- Author
- Library Administrator
As we’re sharing this with our Community Users, assigning these to the “Viewer” Access Level will ensure that they can view the files, but not add or make amendments to them.
The final step to share the Libraries with our Community Users is to ensure that we’ve added the “Library” Component to our Community. Once this is added your users will be able to view and access the libraries that they are members of directly through this component!
Frequently Asked Questions (FAQ’s)
1. What’s the difference between Salesforce Content, Files, and Libraries?
-
Salesforce CRM Content: A feature for organizing and sharing content.
-
Files: Individual documents (e.g., PDFs, images).
-
Libraries: Collections of files with shared access permissions.
2. Can I track how often community users access library files?
Yes! Use Salesforce’s Analytics Tab or build reports to monitor file downloads, views, and user engagement.
3. Why don’t I see the “Libraries” tab in my community?
The Library component must be added to your community’s layout. Go to Community Builder > drag the “Library” component into the desired page section.
4. Are there storage limits for Salesforce Libraries?
Storage depends on your org’s Salesforce Data Storage limits. Check your org’s usage under Setup > Company Settings > Storage Usage. For large files, consider linking to external cloud storage (e.g., SharePoint).